Showing posts with label Decimals. Show all posts

Tuesday, October 6, 2015

Make a Buck


Get ready to make a dollar...using playing cards! Your child will love practicing addition and decimals with this competitive game. Each card within the deck represents a different cent amount. The first player to accumulate the amount of points equal to a dollar wins.

What You Need:

  • Deck of cards
  • Scratch paper
  • Pencil
  • 2 or more players

What You Do:

  1. Announce the values of the cards. Cards with the values 3-10 have cent values equivalent to their numbers (threes = $0.03, fours = $0.04 etc.). The remaining cards have the following values: Twos = $0.20 (2 cents), Jacks = $0.15, Queens = $0.20, Kings = $0.25, and Aces = $0.50.
  2. Ask one player to shuffle the playing cards and deal 5 cards face down to each player. The rest of the cards should be placed face down in a pile in the center of the table.
  3. Players pick up their cards and keep them private so no other players can see what they are holding.
  4. Encourage players to add up the sum of their cards. If no one has $1.00, keep playing.
  5. Each player should take a turn drawing a card from the deck in the center of the table, and discarding one of their cards face up in a discard pile.
  6. Continue playing until the first player has $1.00 in their hand, or the deck runs out.
  7. The player who gets $1.00 first wins! If nobody has won and the deck has run out, whoever is closest to $1.00 is the winner.

Make a Flip Book for Place Value

Does your fourth grader read numbers up to the millions? Most of the time, kids this age know the basic concept of place value as long as it's with ones, tens, and hundreds. But move higher than that, and they need a lot more practice. As they become confident with numbers up to the millions, they'll feel more successful as math problem solvers, and they'll be more ready for fifth grade too.
You can help just by doing short games like scribbling a long number and challenging your fourth grader to read it aloud. Here's a fun hands-on activity to get your child flipping through place value with ease!

What You Need:

  • Large shoe box (or cut cardboard: 6 x 12 inches)
  • Scissors
  • Construction paper (2 pieces of each color: red, orange, yellow, white, blue, green, purple)
  • Black marker
  • Lined paper
  • Ball yarn pencil hole puncher

What You Do:

  1. Have your child review writing numbers by using a piece of lined paper and pencil to write the following numbers as you read them aloud:
    • 450
    • 4,508
    • 68,215
    • 798,012
    • 1,982,545
    • 3,786,901
    • 8,098,654
    • 6,312,855
  2. After he is finished, check his answers to make sure they're written correctly. Remind him that the number "0" is called a "place holder." For example, without the number "0" at the end of problem #1, their answer would only be forty-five, not four hundred fifty. You may also check to see if he wrote his numbers using a comma after each group of 3 numbers, as in the number "4,508." This will help him to think about the number's place value, or how much it really represents, as he is writing.
  3. Tell your child he will be using what he knows about place value to practice reading numbers in the millions by making a game. Have him get one piece of red construction paper and fold it into 8 sections: fold it in half, then fold in half again, and fold the remainder in half. Then ask him to repeat this process for the rest of the construction paper.
  4. He should then use a black marker to write seven sets of the numbers 0-9. When he is finished, he should have a total of 70 number cards.
  5. Have your child grab some scissors and cut out the number cards on the folded lines. Tell him to cut neatly, to ensure the cards are all the same size. Help him use the scissors to cut out the side of a large shoe box. This will be a rectangular piece, about 6x12 inches. (A cardboard box also works fine.)
  6. Have him use a hole puncher to put two holes in the top of each number card- about 1/2 inch apart. Then have him cut 14 pieces of yarn, about 6 inches each.
  7. Your child should then make 7 piles of numbers 0-9 arranged by color. Ask him to lay out the piles on a table in this order: red, orange, yellow, white, blue, green and purple.
  8. Have your child lay the shoe box piece flat on the table. Then have him place 7 number cards on top of the shoe box piece. Use a marker and draw 7 column lines evenly on the shoe box piece, using the number cards as guides.
  9. Use the hole puncher to make 2 holes at the top of each column on the shoe box. Beginning with the purple cards, have him tie the number cards onto the shoe box into the "ones" column with yarn.
  10. Continue this process using the following order:
    • green cards=tens place
    • blue cards =hundreds
    • white cards=thousands
    • yellow cards = ten thousands
    • orange cards = hundred thousands
    • red cards = millions
  11. Have your child label the bottom of each column with the place value name, such as "ones," using a marker. Then have him begin by showing each of the numbers they wrote on paper in Step1 on the colored cards! Ask him to read each number to you aloud.
  12. Next, extend this activity by having your child create his own numbers!

Master Math with a Rounding Race

This is a simple, fast game that you and your child can make together to help him master rounding with decimals. Find an opponent for your child, or use the clock. Either way, be prepared for a loud, exciting and competitive game!

What You Need:

  • 6–7 sheets of paper or 3" x 5" note cards
  • Scissors
  • 2 black markers

What You Do:

  1. Cut the paper into approximately 50 cards, or use 25 3" x 5" note cards, cut in half.
  2. On each card, write dollar amounts in black marker. Use amounts from a penny, all the way up to $999.99. For example:
    • $38.14
    • $750.77
    • $10.75
  3. Briefly review the process of rounding to the nearest dollar. Show your child how $38.14 rounds to $38.00. Here's how: the “ones” place comes just before the decimal, circle it (the 8) and look at the number to its right – 1 – which is less than 5. Therefore, the 8 stays the same and the 1 gets knocked down to 0. You have successfully rounded to $38.00. Have your child practice rounding with a few cards.
  4. Now, it’s time to play! Have your fourth-grader challenge a sibling or friend. Both players sit next to each other facing you. Lay down a dollar card in front of the players. The first player to correctly round the number to the nearest dollar wins the card. Set a timer and play for 3 minutes. The player with the most cards at the end of 3 minutes wins the round. The winner of the game is the player with the best 3 out of 5 rounds.
  5. If no one is available to “race” your child, challenge her to play against the clock. Set the timer for 3 minutes. Show her dollar cards one at a time and have her call out the rounded amount. See how many cards she can get in 3 minutes.
  6. Challenge her to beat her record and reduce her time to 2 minutes, then 1 minute.
It’s always more fun if you supply “prizes” for the winner (and a consolation prize for the runner-up). But whatever way you crack it, this game will give kids another reward—the ability to approach rounding without fear.

Monday, October 5, 2015

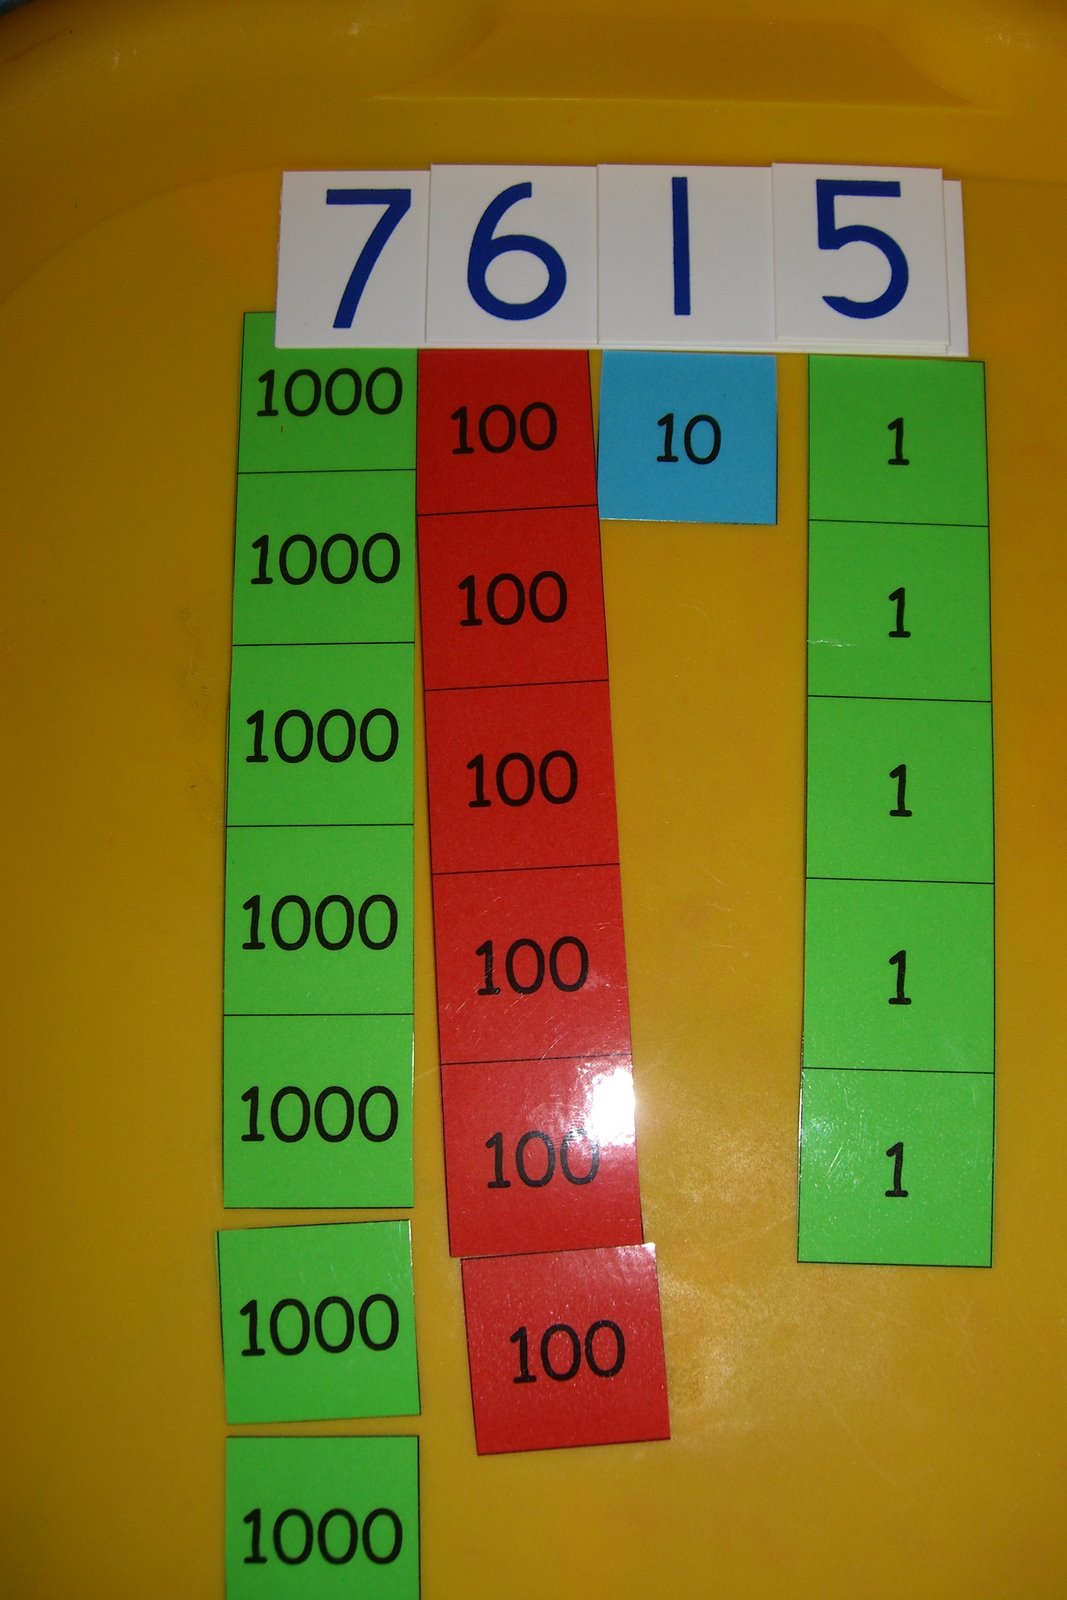
Place Value, Stamp Card Game


You can also use these stamp cards to reinforce the fact that
there are never more than 9 units (or nine 10s or nine 100s, etc.). You
throw a bunch of cards out and then trade for a higher place value
card whenever you count 10. So, if you have 23 10s cards you'd trade
10 10-cards for a 100 card, then another 10 10-cards for a 100 card.

Click Here for Reference

Regrouping Toothpicks


Showing Place Values
Place toothpicks showing 40 + 3 to begin the question.
Objectives:
  1. Learning and practicing regrouping
  2. Print examples of regrouping in student math journals
  3. Learn term names:  minuend take away subtrahend equals difference/answer (for subtraction) and addend plus addend equals sum/answer (for addition)
Materials for each group of 4-6 students:
  1. twenty groups of 10 popsicle sticks or toothpicks gathered with an elastic, plus 10-20 loose popsicle sticks (students can count out sets of 10 on their desks and you can help them wrap the elastics around them)
  2. index cards with numerals 0-9 on them, one number on each card, as well as cards printed with  “+” ,  “-”, “Ones”, “Tens”, and “Hundreds”, PLUS SOME BLANK INDEX CARDS (for the answers).
  3. math journals for each student
  4. pencils and erasers for each student
  5. Chalkboard or Chartboard showing an example of one addition question plus one subtraction question, heading up the columns with “Hundreds”, “Tens” and “Ones”.  The title above the two questions says “Regrouping”.
  6. Marker for each group (to write the numerals needed for the answer cards)
Subtracting Using Place Value
Regroup showing students the 20 + 9 you've taken away to end up with 10 + 4 which is the answer 14.
  1. Each group of students finds an area to sit in a group, either in a gathering of their 4-6 desks or on the floor somewhere.  Teacher gives each group ten numeral cards 0-9, plus cards with “+”, ”-”,  “Ones”, “Tens” and “Hundreds”, plus some blank index cards.  Also give twenty bunches of 10 popsicle sticks gathered with elastics, plus 10-20 loose popsicle sticks.   They each have their pencils and erasers and math journals with them.
  2. Teacher tells students, “We are going to practise regrouping.  First we’ll ‘make’ the number with the cards, then we’ll ‘make’ the number with the popsicle sticks.  We’ll learn how to ‘regroup’ the digits so that we can add or subtract the numbers really easily.”(Teacher info:  I mix the grades in the groups, so that all groups comprise of both grades; the grade 2′s LOVE to help the grade 1′s master this.  Grade 1′s just have to add or subtract to 100, Grade 2′s up to 200.)
  3. Teacher then calls all students together in a learning circle and tells them that we’re going to do the first few questions together.  Work with the students as a group for a few minutes until they ‘get’ the idea.
  4. Put down a card that says “Ones”.  Tell students that only numbers with one digit can go under this card.  Have them tell you all the numbers with one digit (1, 2, 3, 4, 5, 6, 7, 8, 9).  Tell students that therefore only up to 9 popsicle sticks can STAY** under this column.   Once you have 10 popsicle sticks, you need to regroup them into a group of 10 with an elastic around them and move them into another group.
  5. Put down the “Tens” card to the left of the “Ones” card.  Tell students that only up to 9 groups of ten popsicle sticks can STAY** there (**This is important because when you regroup later you will have to add 10 to a number in the Ones column so you may have 13 popsicle sticks in the Ones column for a minute or too**).  Once you get 10 groups of 10 popsicle sticks, (100, count by 10′s so they see that it’s 100) they have to go into a new column “Hundreds”.  Put that card to the left of the “Tens”.
  6. Ask  a student to give you a two digit number (43).  Teacher puts down the card 4, then the card 3.  Ask for another number  (21).   Teacher puts down the card 2, then the card 1.  Line them up above each other, in tens and ones and hundreds columns.  Put the card “+” in front of the 21.
  7. Get students to help you put the correct number of popsicle sticks on each number card.  Example:    3 popsicle sticks go on the “3″ card.  4 groups of 10 popsicle sticks go on the “4″ card EQUALING 43.  Ask students what number this makes.  Have them count the popsicle sticks to make sure it’s correct…10, 20, 30, 40, 41, 42, 43.
  8. Do the same for 21….10, 20, 21.  Popsicle sticks sit on top of each numeral card.  Example 2 groups of 10 sit on the 2 and 1 single popsicle stick sits on the 1 card.
  9. Now tell students we’re going to ADD 43 and 21.  Put down two blank index cards where the answer will go and tell students this is the answer.  We don’t know it yet.  It’s blank or unknown.  Tell them we always start with the ones.  3 ones and 1 one is 4 ones, so gather up the 1 and the 3 and put the 4 popsicle sticks on the blank card in the “Ones” column.  Now have them help you ‘add’ the 4 groups of 10 (40) and the 2 groups of 10 (20), counting by 10′s….so they get the answer 6 groups.  Put the 6 groups on the card in the “Tens” column.  Ask them what the answer is.  See if they can count by 10′s and add the 1′s to get 64.  When they ‘get’ the answer, print the numerals on each card “6″ and “4″.  Show them how to print the question and answer in their math journals.I’ve done this with quite a few grade 1 and 2 mixed classes.  They always ‘get’ it and it’s super for getting them to understand that the ’4′ in ’40′ is really ’4 groups of 10′ and when you get ’100′, it’s really 1 group of 10 bunches of 10′s.This lesson is a great one to do before you start working with the hundreds flats.After they understand the regrouping concept, you can do this same lesson with unit cubes (1′s), ten rods (10′s) and hundred flats (100), switching 10 single unit cubes for the ten rods and switching the ten rods for the hundreds flats when you regroup.  It makes regrouping so easy to understand when you see it done like this.
  10. Do a subtraction question with them before you send them into their groups to work.  Try 51 – 29    Have students put the 5 groups of 10 on the “5″, the 1 single on the “1″, the 2 groups of 10 on the “2″ and the 9 singles on the “9.  Ask them if they can take 9 away from the 1.  No, of course not.  Tell them that you need to “regroup” the popsicle sticks so that you can take away the 9.  Take one of the group from the numeral “5″ , undo the elastic and put the 10 popsicle sticks with the 1 so you now have 11.  Can we take 9 from 11 now?  Yes.  Put the “2″ in the “Ones” column on the blank answer card.  Now we have 40 take away 20.  Have them count the 4 groups and 2 groups of 10, so you take away 2 groups from 4 groups and you get 2 groups.  Put the 2 groups of 10 on the “Tens” answer card.  Have them count the answer and tell you what the numerals will be “2″ and “2″.  Print the answer on the blank answer cards.    On the whiteboard, show them how you cross off the “51″ and write ’4 and 11′ above it so students can see you “regrouped” the “51″ into ’4 groups of 10 and 11′ which still add up to ’51′.  They can see how they got ’2′ when they took away the 9 from the 11, and then they can see how they got ’2 groups of 10′ when they took ’2 groups of 10′ away from the ’4 groups of 10′ which was regrouped into ’4 groups of 10 and 11′.
  11. Have students go back to their groups and either have them do a few questions you write on the chalkboard or chartboard, or call them out one at a time, orally, then taking up each question before giving out a new one.  Students now explain to you how they got the answer, explaining how they regrouped their popsicle sticks to you.
  12. I start out with adding questions, then go to subtraction questions, keeping them simple for a bit, until I see that they understand the concept of regrouping.  Then I begin alternating the questions for grades 1 and 2.  For example, I’ll say, “This is a grade 1 question.”  The grade 1′s control the cards and the regrouping efforts.  Grade 2′s can help.  Then “This is a grade 2 question.”  The grade 2′s are in charge now and work on the “harder” questions but the grade 1′s can help them still.  I have found that they grasp this concept so well, often the grade 1′s can do the harder grade 2 questions (questions over 200) just as easily as the grade 2′s.
  13. You can show students how to double check their answers for subtraction by adding the subtrahend and the difference (for subtraction). The popsicle sticks are still on the subtrahend and the difference (or answer)  (for subtraction).  You can also teach them the names of the numbers for addition:  add one addend to the other addend to get the sum (answer).

Monday, September 14, 2015

First Grade: Race to a Quarter

The first is a money trading game, a lot like the
chip trading game I described here.

This game is VERY simple but powerful for the kids
because it helps them to make those connections that 5 pennies = 1 nickel,
2 nickels = 1 dime, etc...
Each student has a gameboard and there is one student in each group
that I select to be the banker.
I love using these chip trays to organize manipulatives!
Gotta love the Dollar Tree! :)
Students roll dice and collect coins from the banker
and keep making trades.
I call this game, "Race to a Quarter!"
The other game I made so my students could simply have
practice using coins to show different amounts.
It's called, "Piggy Race", because they are trying to
get to the piggy in the middle first to be the winner.

Third Grade: Real World Math


2.3 based on 18 ratings
By
Updated on May 3, 2013
It's an old adage in the world of education, but it's true: math is all around us. You can try this simple activity with your child to get him thinking about the real world math you use everyday. While you're at it, you're strengthening key third grade math skills that you can expect your child to encounter all year.

What You Need:

  • Supermarket ad
  • Pencil
  • Paper

What You Do:

  1. Grab your weekly supermarket ad and look through the advertised specials together with your child. Ask her to circle 5-10 items she likes and then use these sale prices for practice with addition, subtraction, division and multiplication problems. (This activity can easily be substituted with restaurant take-out menus, clothes, game catalogs, or book order magazines.)
  2. What's the total cost? Ask your child to line up all the decimal points in order to correctly compute the total cost.
  3. How much change? As with addition, line up the decimal points before solving subtraction problems. Then have your child find the amount of change that you would receive from a $100 bill if you bought one item, two items or all items, depending on the price of the items.
  4. How much for five? Your child should solve multiplication with decimal problems in the same manner as he would normally solve multiplication problems, but they must remember to move the decimal point over in the answer as many places as are in the problem. Have him find the total cost of purchasing 5 of the most expensive item.
  5. How much if we split it? Division with decimals simply requires your child to include a decimal point in his answer directly above the decimal point in the dividend (the number being divided). Then have your child calculate how much each person should pay if 2 people split the total cost of the groceries, rounding their answer to the nearest cent.
While this activity offers lots of fun and challenge even when it's done occasionally, it's even better if you make it a regular feature of your weekly shopping. Do it often, and your third grader will thrive in math--but even better, will be prepared to be a savvy consumer for life.
Jane Oh has taught third and fourth grades for 8 years. She has worked with many diverse groups of students. She has also taught adult ESL and enrichment courses for youth at local community colleges. Most recently, she has written teacher textbook guides.

Click for Reference

Friday, September 11, 2015

Exploring Technology in the Elementary Classroom


Time Math by Recession Apps LLC


            Time Math is targeted to children in the second grade.  I could see this app used for students beyond second grade if they were still struggling with telling time.  This app is free and can easily be found on the app store for Apple products.  The specific math area of this app is the concept of time.  This app provides five different levels that can be explored.  The first level provides information on how to tell time.  The user learns what the hour and minute hands are used for.  The next level consists of asking the user “What time is it?”  The user then has the choice to select the intervals that will be asked.  These include: easy (hours), medium (fifteen minutes), hard (five minutes), harder (hours and five minutes), and hardest (hours and minutes).  The user is asked this each time they select one of the four levels.  The app generates a clock with a set time in relation to the difficulty selected and the user is asked to pick the correct answer out of three options.  The next level is “Set the Time” and asks the user to drag the hour and minute hand on the clock to the time that is indicated.  The last two levels are “What time will it be?” and “What time was it?”  Both of these levels require students to drag the hour and minute hand around the clock to reach the requested time. The graphics and design of this app is aesthetically pleasing.  The app is also very easy to navigate and allows for some many different difficulty levels, which is great for users who are just being introduced to telling time all the way through students who are more advanced.  When teaching a lesson about time, I think having this app projected on the board and/or giving each student an iPad to use with this app would be a great way to demonstrate time and walk through some problems together.  Instead of doing a worksheet, students could spend some time going through problems on their own. 

Academic Skill Builders http://www.arcademics.com/games/


            Academic Skill Builders is a free website with a plethora of fun math games.  The great thing about this website is that the user can select whatever grade level and subject they would like.  The grades range from first to sixth and the subject levels include shapes, counting, addition, subtraction, multiplication, division, integers, money, time, decimals, fractions, ration and proportion, and algebra.  Therefore, this website is great for all elementary students.  For the most part, the grade levels are on point.  This website appears to be set up to allow students the chance to practice math skills through fun and competitive games.  Parents, teachers, and administrators can also be at ease when having students online because the designers of this website were conscious about online safety. “Private” games can be set up with a password, so a student and his or her friends could organize games to play against each other in a private game.  “Public” games can be joined by anyone at anytime but there is no contact between the outside players and the student. The website also monitors player names and blocks inappropriate ones.  One of my favorite games I stumbled across while exploring this website was Jumping Chicks.  This game would be perfect for kindergarten and first grade students because the purpose of the game is to match the number to a pile of leaves that has the same number.  Your chick then jumps to that pile of leaves and the player is asked to complete the same steps again to keep your chick moving forward.  This is a fun and easy way to practice counting from one to ten. If ever in the computer lab or near computers and students finish their work before others, this would be a great website to have students visit until everyone was completed.  Having a math station in the classroom could also promote the use of this website.  Students would be able to select this math website, as opposed to a math worksheet, and have fun while still practicing their math skills.  This website, and the other website and apps I chose, provide visual learners with engaging animations to look at and allows game-based learning in a fun and interactive way.

Funbrain Math Arcade http://www.funbrain.com/brain/MathBrain/MathBrain.html


            Funbrain Math Arcade is intended for students in grades one to eight; however, after playing through this game at multiple grade levels, I feel that this game should really only be applicable for students in third grade and higher.  The reason I say this is because I do not think that students in second grade or below would have the proper hand-eye coordination and reading skills that are necessary for this game.  I had a hard time doing it myself so I have a feeling that very young students would struggle with the ability to select the right answer and figuring out how the game works.  Regardless, this website is great because it allows students to play in the format of a board game and has 25 different math games for them to play.  I think this would be great to use as a mini math activity maybe once a week.  Students could login with their saved password and complete five rolls on the game board, which means five games.  I would guess this would take around fifteen minutes. Depending on the grade level entered, the games ask students to add, match, adjust height and distance, subtract, multiply, divide, etc. A few things that I wish could be changed about this game is that the levels do not provide a lot of feedback for students who struggle and may need assistance or a hint.  However, the student is allowed to start that game level again after so many attempts.  I do like that the each game is fairly short and keeps the student motivated to win and unlock the next game.  Each game level also provides so much variety that could be tied into lessons.  For instance, one game level takes place inside a pyramid tomb and has images of Egyptian sarcophagi.  This could tie in nicely with a geography and social studies lesson on Ancient Egypt, as well as, reading aloud or independently reading books about mummies, pharaohs and pyramids.  There are a lot of options for using this website within the classroom. 

Todo Math by Enuma Inc.

This free app is by far the best math app I came across.  I love this app because the logistics and layout are fantastic.  Additionally, this app is perfect for student just beginning math, as well as for students who are up to second grade.  This app covers many specific math areas, such as: counting and cardinality, number operations, mathematical reasoning, time and money, and geometry.  The intended purpose of this app is to allow students to trace numbers and shapes, practice patterning, subtraction, adding, multiplying, and so much more.  I think the number and shape tracing is a great addition to this app; it’s probably my favorite part about the app because it would be such a huge help for students who are just learning how to write their numbers and drawing their basic shapes. I can easily see this app being used within the classroom because of all the great features it has.  The teacher could demonstrate how to use the app and then the students could follow along and complete each number and shape together.  A lot of the levels seem to follow the same order; therefore, it would be easy to have the teacher and young students complete the lower levels together to make sure that every student understands the process and the content.  This app seems like such a great tool to use because of the way it asks students to select the numbers and then draw them as well.  I feel like it reinforces their learning and knowledge. One downfall to this app is that although it says it is free, there are limited levels that can be played on the free version and buying this app is incredibly expensive.  However, I could justify buying this app for $24 each because it is so comprehensive and of high quality.  It also changes displays according to the seasons, which is cute, but could also be integrated into learning the new season each time it changed.  Lastly, this app was built with the classroom in mind.  If teachers do not have the budget to buy Todo Math, teachers may qualify for the school year’s Todo Math Grant Program.  Additionally, this app has a web-based teacher dashboard that tracks progress, students can play Todo Math at home on parents' iPhone or iPad and their progress is synched to your teacher dashboard, and school level management allows for supporting device sharing between classrooms (cart system) and multi-teacher management of school account.